Another way to start monetizing outside the Substack subscription model is to use an existing CashApp account in addition to Stripe.
With CashApp, you leave the world of Stripe and PayPal behind you and make your monetization more robust. You won’t be canceled on all three platforms at the same time. CashApp is owned by Block Inc., which was formerly Square.
CashApp can be used only in the USA and the UK; international usage is impossible. However, both countries have a solid user base, with more than 50 million users.
You might ask now:
“Why are you telling us a solution not usable in more countries?”
I want to inform you that PayPal and Stripe are more expensive—PayPal costs between 3.2% and 11.0% for domestic payments, and Stripe costs between 5.9% and 33.0%.
With CashApp, you pay 0.0% if you use a private account (not allowed for business) and a flat fee of 2.75% with a business account.
Wow!
Think about it.
Let's assume you generate $10,000 in yearly revenue on Substack. Then you have payment costs if you pay an average of 8% to Stripe (and that is modest) of $800. And you pay 10% to Substack, which results in $1,000. $1,000 for a platform that is flawed in many aspects, often causes problems, and lacks professional support.
Your cost of operation with Substack is very high—18% of your income, or $1,800 in this use case. That is a higher “tax rate” at Substack than many small business owners suffer from the IRS.
You pay $1,800 literally for nothing. With CashApp, you go down to $275 or nothing (not allowed).
Have you ever earned $1,525 faster?
That is not the real effect because not all your customers use CashApp. But you can ask them and explain why you prefer payments via CashApp. In my experience over the years, many customers honor such requests. Especially with CashApp, the use is easy and self-explanatory for the customer.
Interested?
Here we go:
1. Download or open the CashApp on your phone or tablet
Register a CashApp account or log in to your account
Click on Settings — the personal symbol in the upper-right corner.
2. Find your QR Code
Click on the QR code symbol in the upper right corner.
3. Make a screenshot of your QR Code
Click on “My Code” and screenshot the QR Code.
You also see your $cashtag in the second line. Note it
.
IMPORTANT!
With CashApp, you cannot produce codes with a preset amount.
Therefore, I recommend explaining its use each time you integrate it into your Substack.
4. Insert the CashApp link to your Substack on the page you need it
Open the menu “Button” in your Substack editor and click “Custom.”
5. Generate the CashApp payment button for your Substack
In the first line, insert the text for your button; in the second line, insert the payment link which is always
https://cash.app/$cashtag
Replace $cashtag with your own $cashtag. For example, for LIVE WITHOUT LIMITS this is the link: https://cash.app/$LiveWithoutLimitsNow
6. Insert the QR code and text to get support above your payment button; I have created a sample below that you can adopt.
You can also integrate several different payment links; in the example, I have also added Paypal and Stripe.
Example for your usage:
With this QR code, you can support SUBSTACK 101 KICKSTART via CashApp. There is no preset amount, so please feel free to give whatever you want and can give. Every support is appreciated.
If you paid for a subscription, please send an email to (insert your email address here) and include your $cashtag and registered Substack email to activate your subscription. Thank you!
If you cannot scan it, please click on smartphones the button below to open your CashApp. Just insert your amount and send the payment!
Thank you!
IMPORTANT LAST STEP:
If you use any of those payment solutions for your subscriptions, which I highly recommend, you must manually activate the subscription for every user.
Go to “Subscribers” in your dashboard.
Search for the email of your subscriber.
Click on the email.
Click on “Edit subscription.”
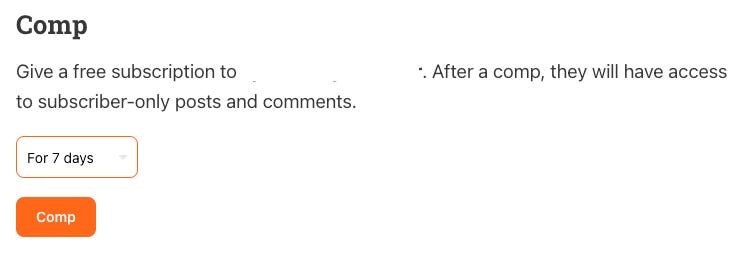
Choose under Comp the desired term and click “Comp”
That’s it!
You created your individualized CashApp payment link for your Substack!
You also learned to integrate different payment solutions below each other.
You learned how to activate a subscription.
You can use one of the above links to support SUBSTACK 101 KICKSTART!
Do you enjoy SUBSTACK 101 KICKSTART?
Please consider upgrading to the paid subscription:
If you prefer to pay just for this content, that is fine. Here we go:
You don’t want to miss this? So join my amazing journey with you and your Substack by subscribing to SUBSTACK 101 KICKSTART. We’ll have fun, and I promise you for your Substack:
The best is yet to come!
Here, you can learn why you should never use BuyMeACoffee:


