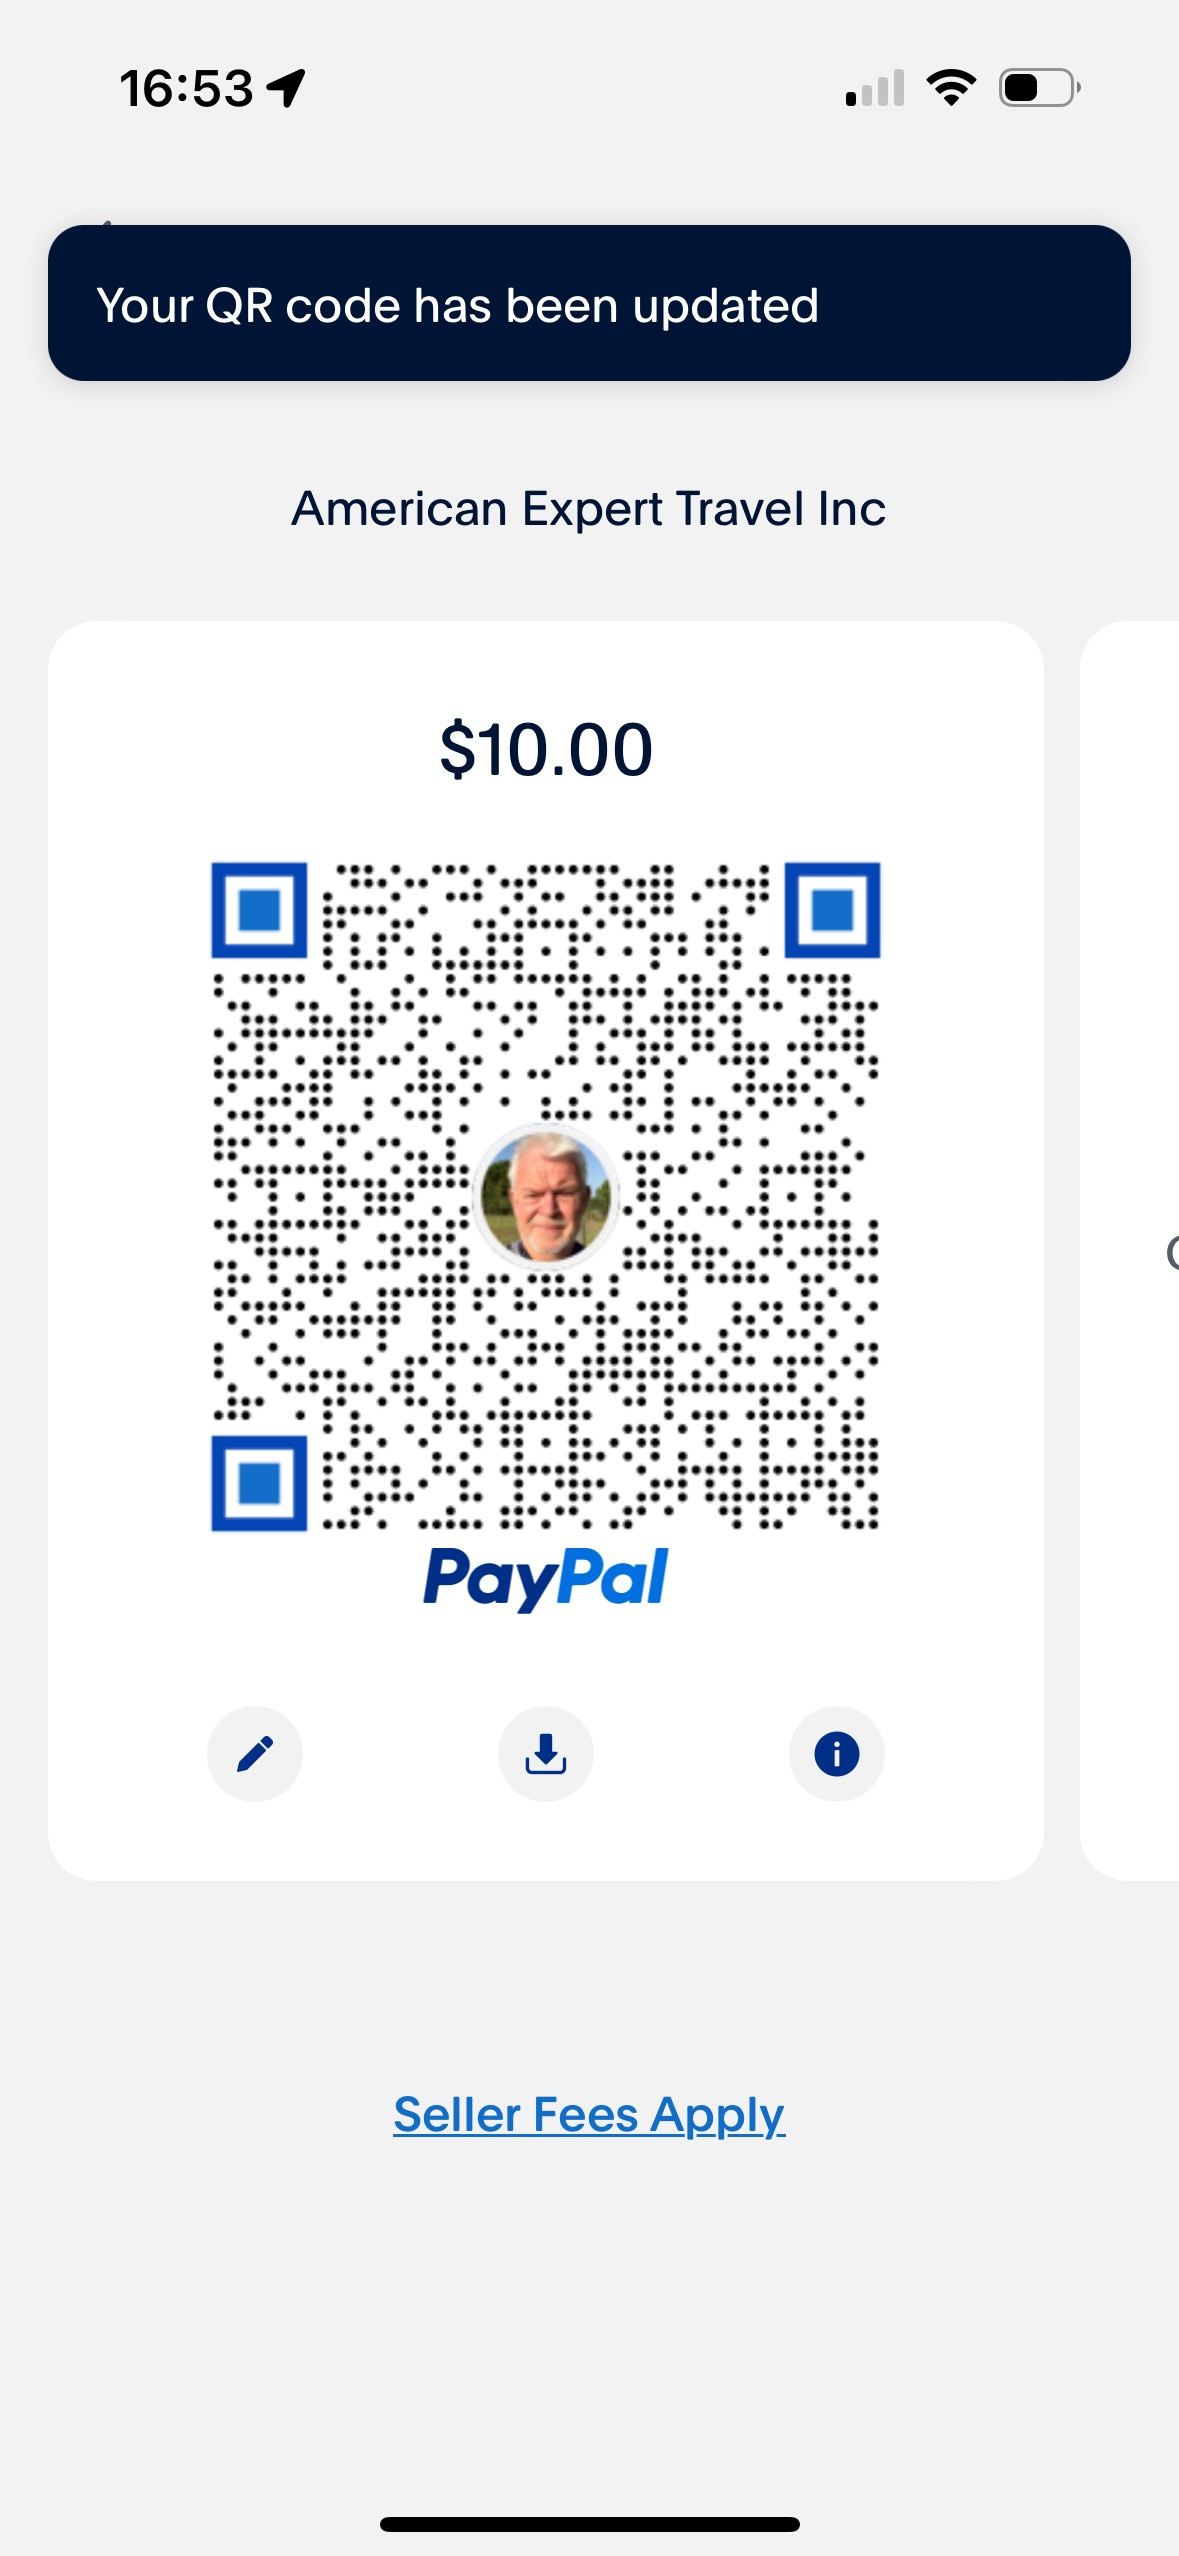
A fast way to start monetizing outside the Substack subscription model is to use an existing PayPal account in addition to Stripe.
Some folks might think that's “Cool” now and believe they can use the “Request Money” feature to receive funds with no fees. As much as I can understand this because every way to avoid fee robbery is more than welcome, I must warn you that this is not a good way. Sooner than later, PayPal registers this, and then you might be blocked for a long time.
The easiest way to use PayPal for Substackers is through paypal.me-links. The astronomical fees you can find below.
You might ask now:
“Why are you telling us a solution that is even pricier than Stripe?”
I want to make you aware that the most common solution — paypal.me-links — cost you between 7.9–52.0% (Stripe 5.9–33.0%) for domestic payments and international payments between 9.4–53.0% (Stripe 8.5–36.0%)
National use paypal.me:
$1 payment: 2.99% → $0.03 + $0.49 → $0.52 → 52.0% fee
$2 payment: 2.99% → $0.06 + $0.49 → $0.55 → 27.5% fee
$3 payment: 2.99% → $0.09 + $0.49 → $0.58 → 19.3% fee
$4 payment: 2.99% → $0.12 + $0.49 → $0.61 → 15.3% fee
$5 payment: 2.99% → $0.15 + $0.49 → $0.64 → 12.8% fee
$10 payment: 2.99% → $0.30 + $0.49 → $0.79 → 7.9% fee
International use paypal.me:
$1 payment: 4.49% → $0.04 + $0.49 → $0.53 → 53.0% fee
$2 payment: 4.49% → $0.09 + $0.49 → $0.58 → 29.0% fee
$3 payment: 4.49% → $0.13 + $0.49 → $0.62 → 20.6% fee
$4 payment: 4.49% → $0.18 + $0.49 → $0.67 → 16.75% fee
$5 payment: 4.49% → $0.22 + $0.49 → $0.71 → 14.2% fee
$10 payment: 4.49% → $0.45 + $0.49 → $0.94 → 9.4% fee
But there is good news!
QR-Code-Transactions cost “only” 2.29% plus $0.09. So the fees look now much friendlier:
$1 payment: 2.29% → $0.02 + $0.09 → $0.11 → 11.0% fee
$2 payment: 2.29% → $0.05 + $0.09 → $0.14 → 7.0% fee
$3 payment: 2.29% → $0.07 + $0.09 → $0.16 → 5.3% fee
$4 payment: 2.29% → $0.10 + $0.09 → $0.19 → 4.8% fee
$5 payment: 2.29% → $0.11 + $0.09 → $0.20 → 4.0% fee
$10 payment: 2.29% → $0.23 + $0.09 → $0.32 → 3.2% fee
Foreign payments are also 2.29% and have different fixed local upcharges comparable to $0.09.
Do you understand now why using PayPal might make sense to you?
QR-Code-Transactions cost around a third of Stripe!
Interested?
Here we go:
1. Download or open the PayPal App on your phone or tablet
Steps 1 to 8 apply for private accounts. For business accounts, proceed with step 9.
Register a Paypal account or log in to your account
Click on the QR Code symbol.
2. Find your QR Code
Click on “Your code”.
3. Find your Seller QR code
Click on “Show your Seller QR code”
4. Seller QR code page
click “Get started”.
5. QR code with options
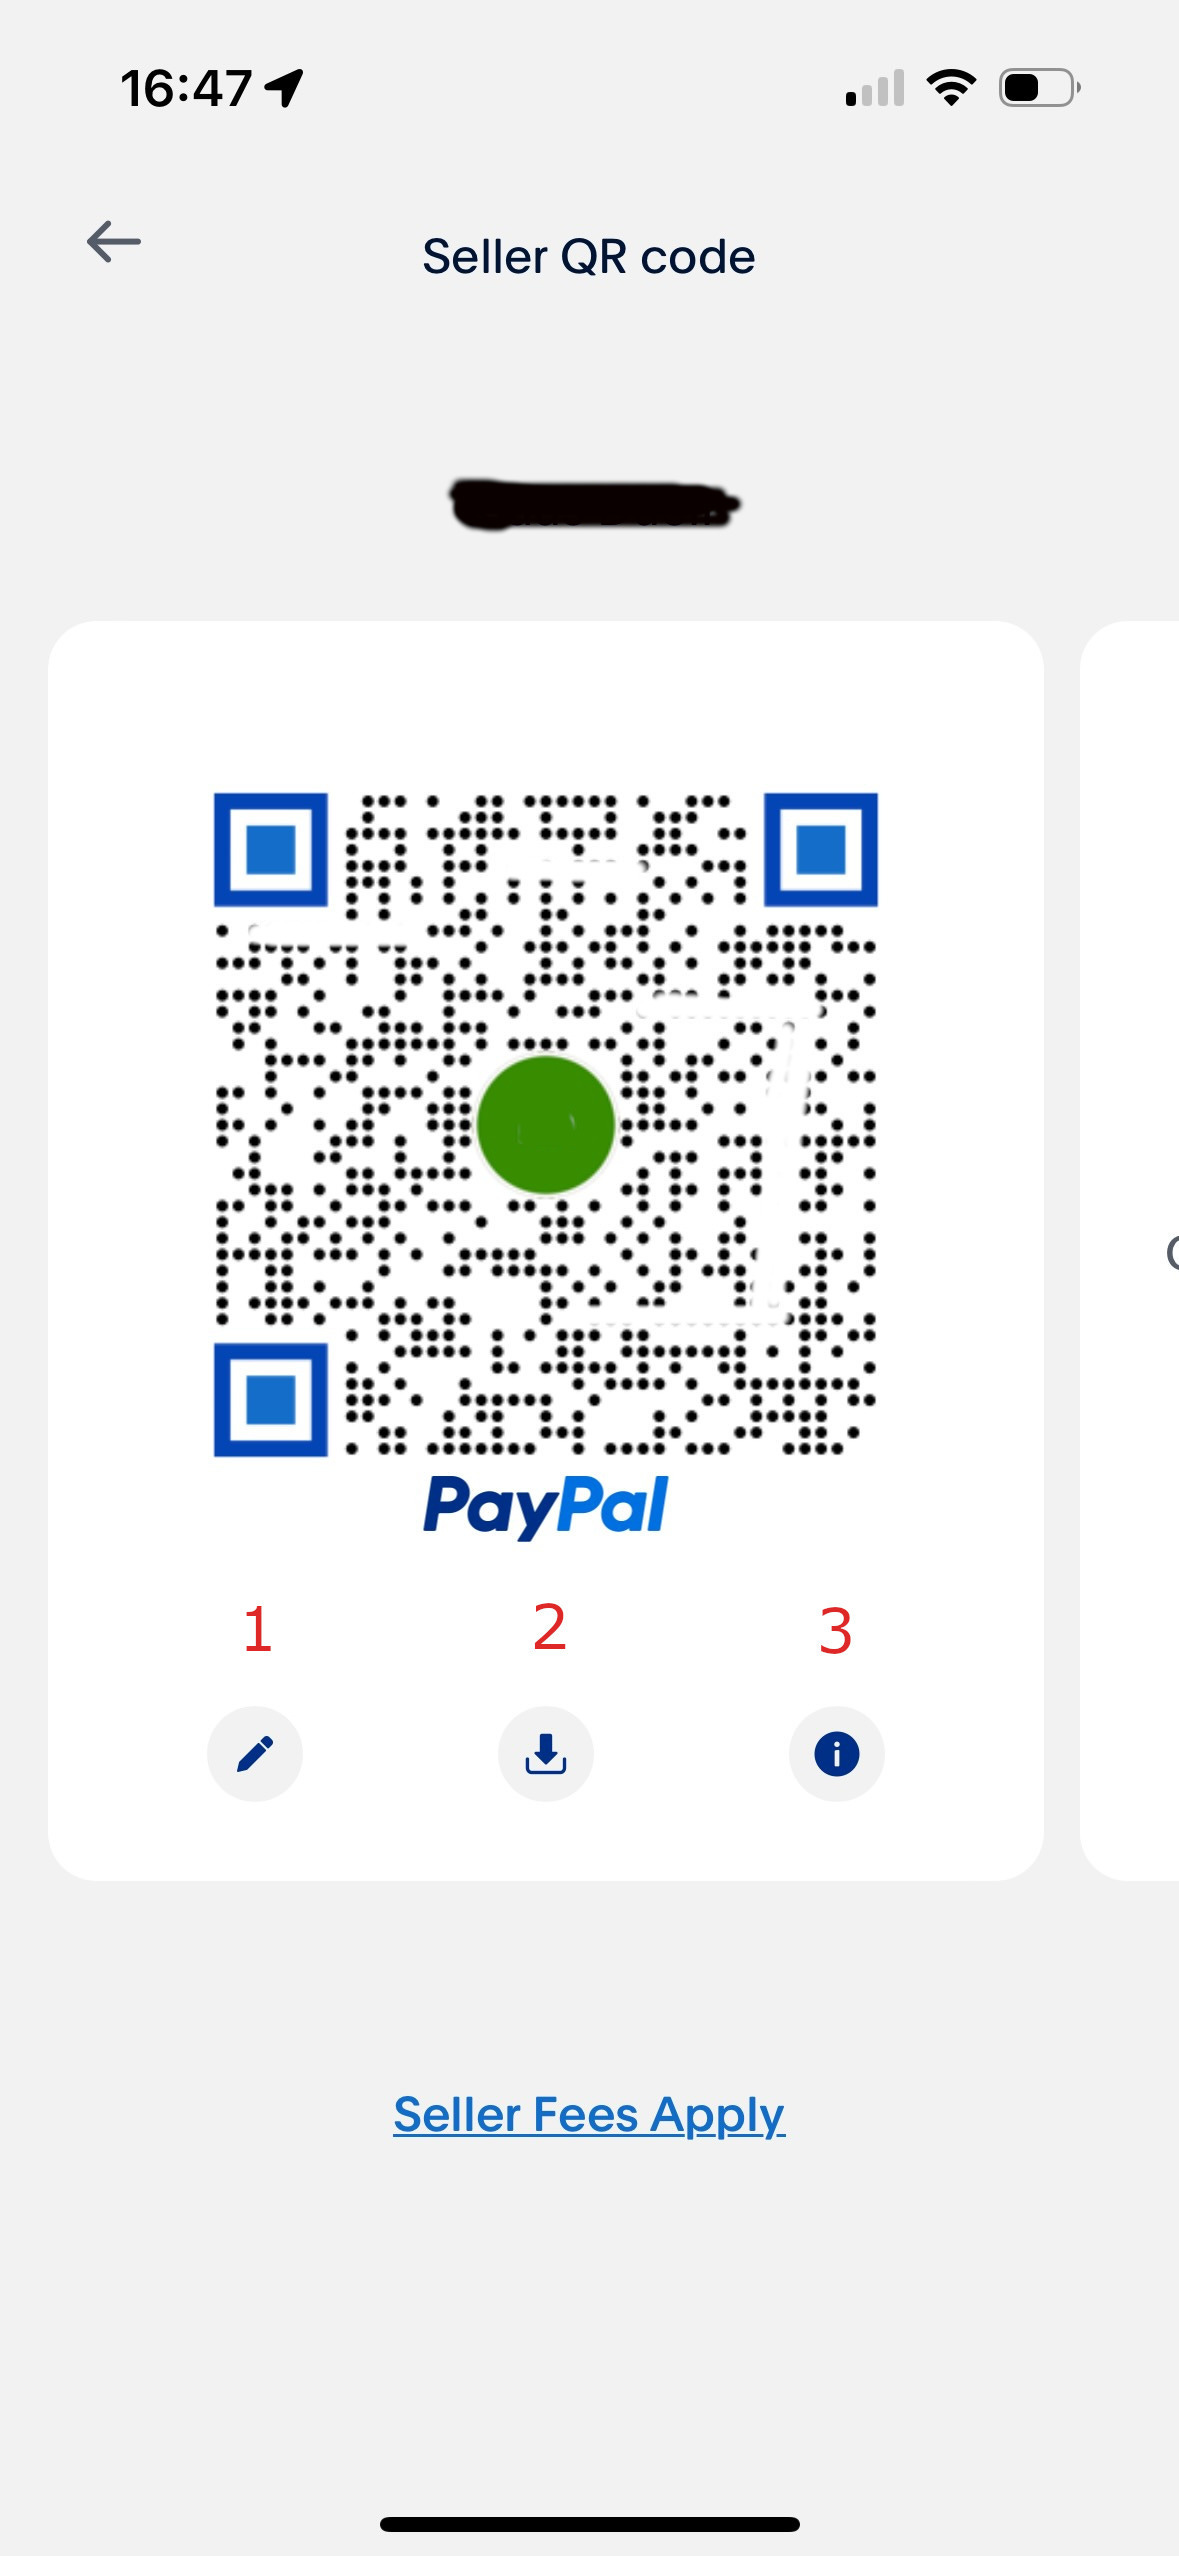
Now, you see your seller code with your name at the top and your initials or your profile picture in the middle. At the bottom, you can choose from three options.
Insert amount/tip
Download code
Help
Click on option 1.
6. Specifying the payment amount
I recommend producing several barcodes for the payment amounts you need.
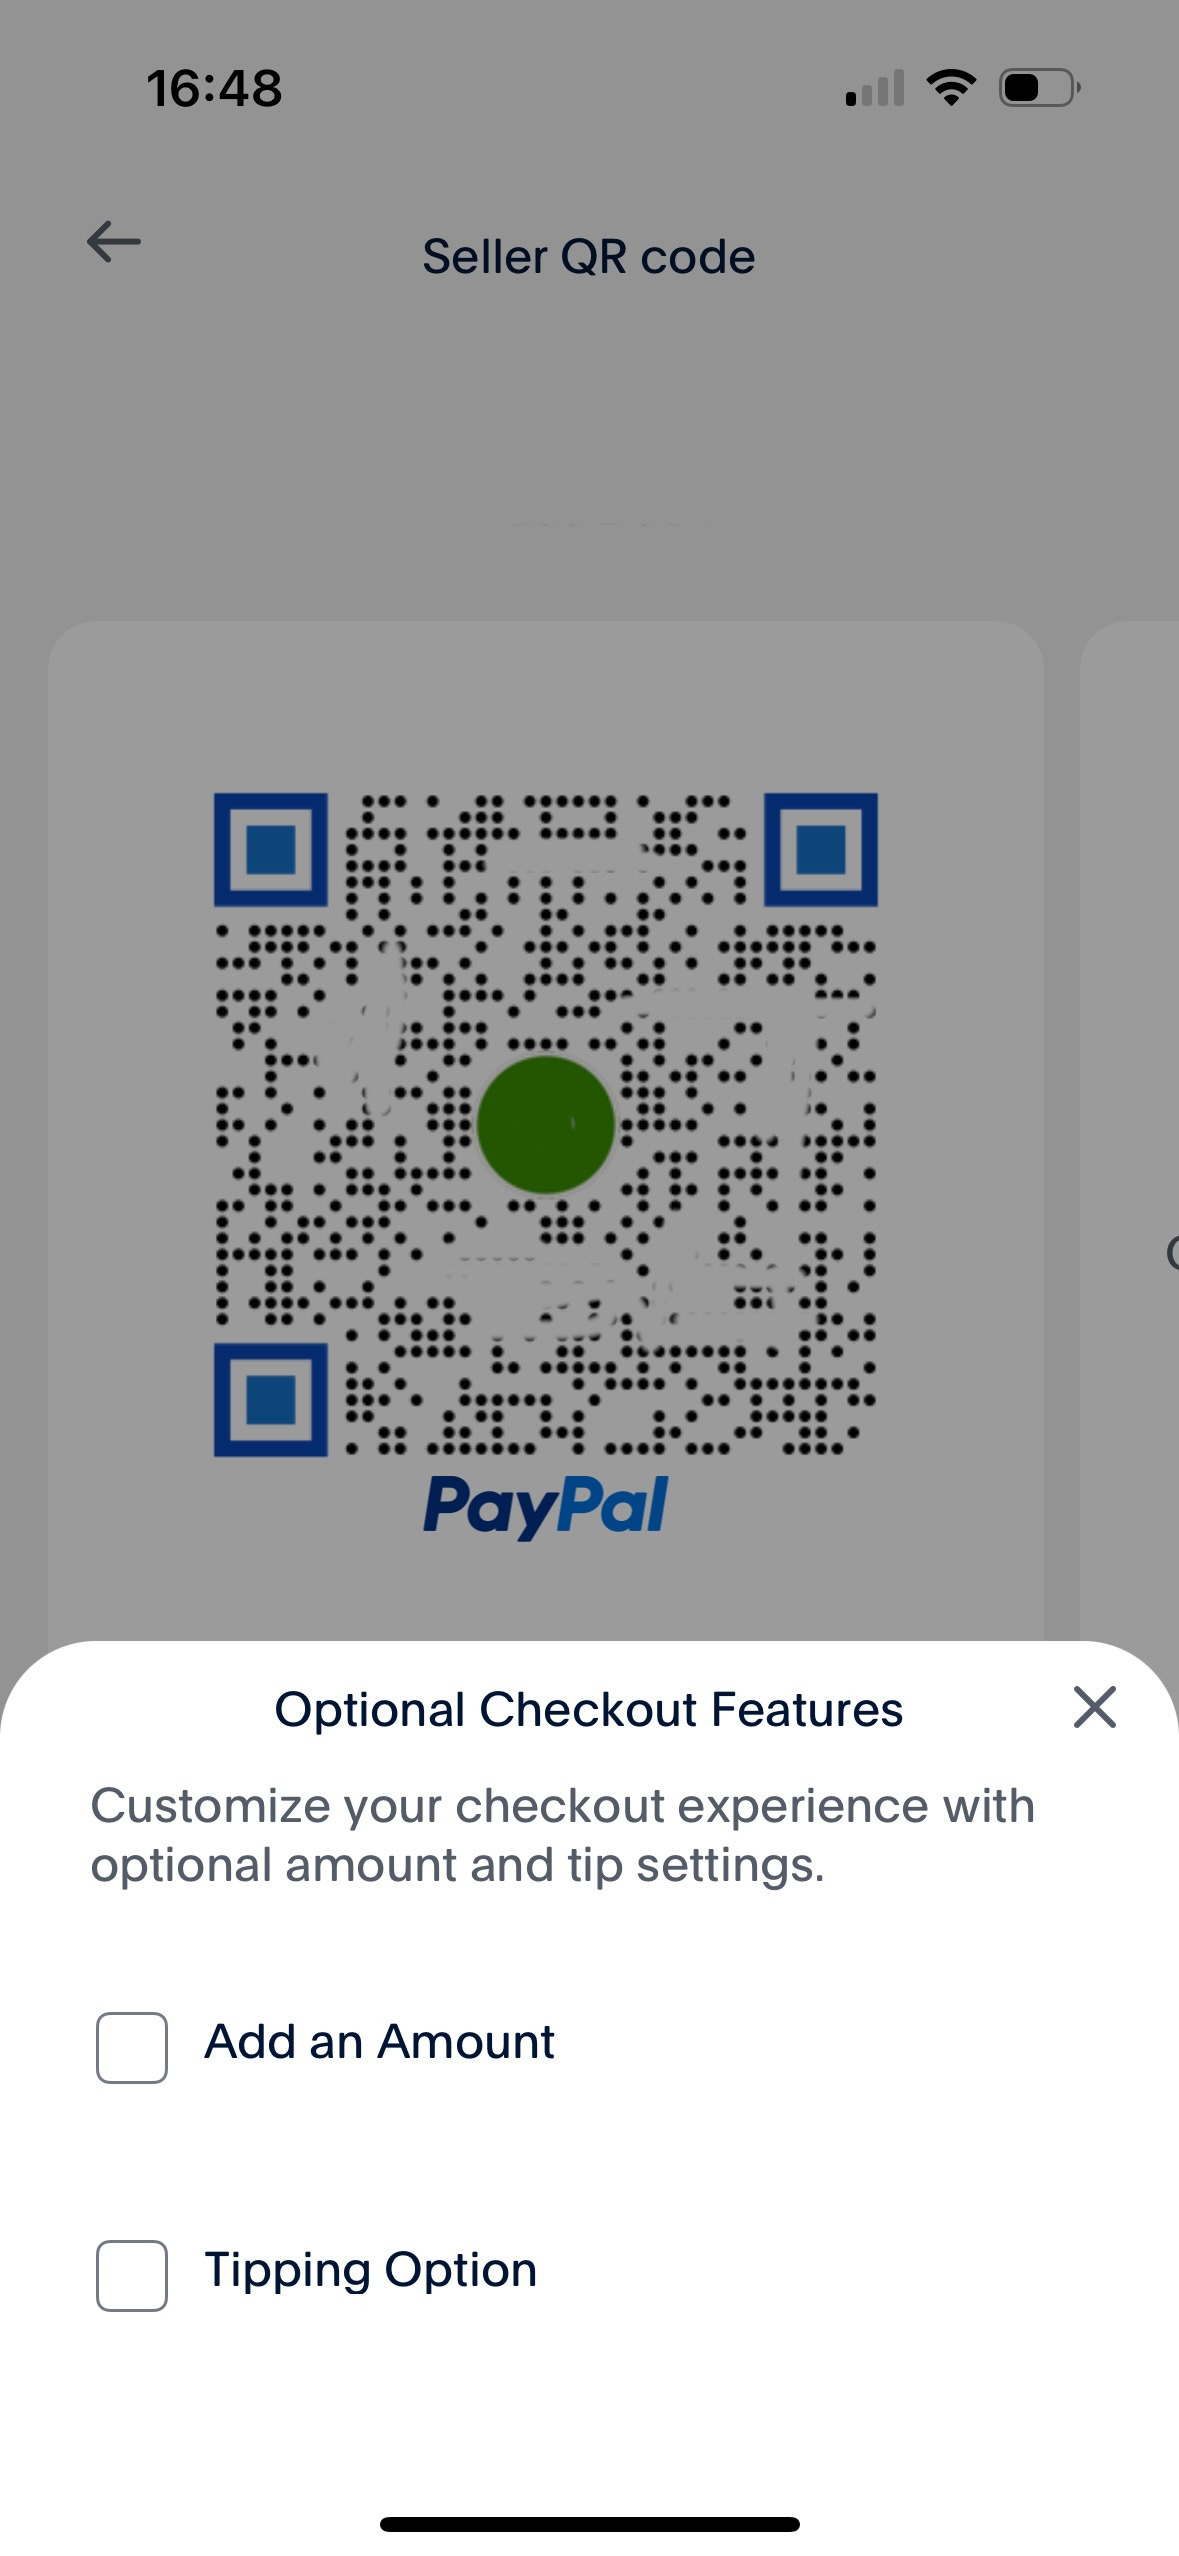
Click on “Add an amount”.
7. Produce the code with a fixed amount
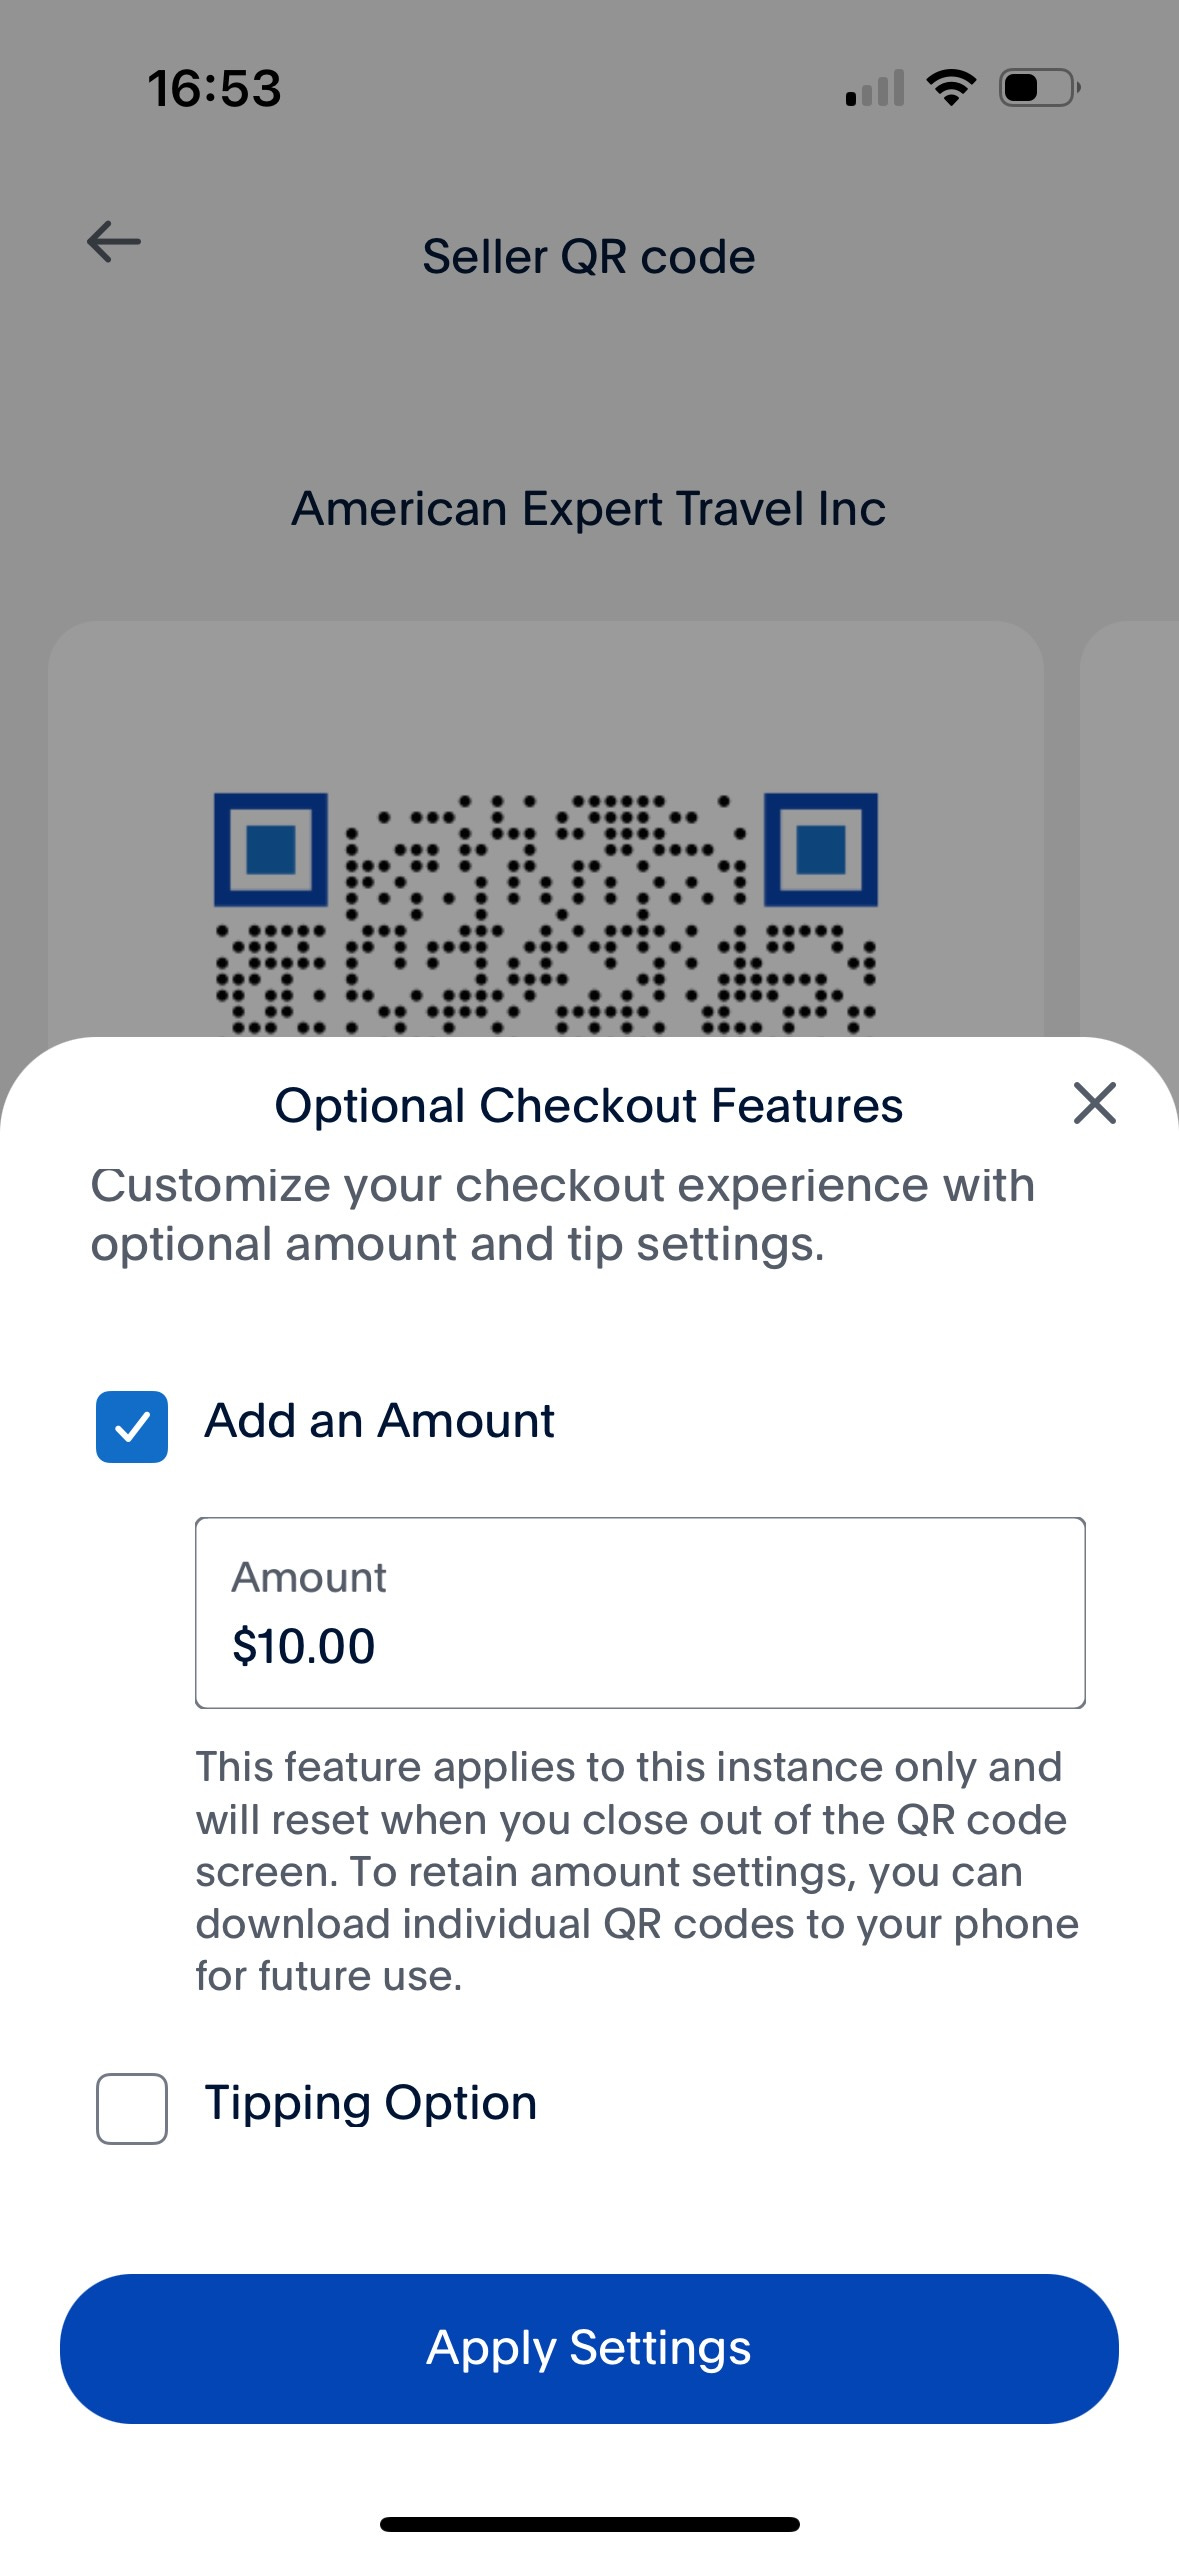
Tick “Add an Amount” and insert the desired amount.
Click “Apply settings”.
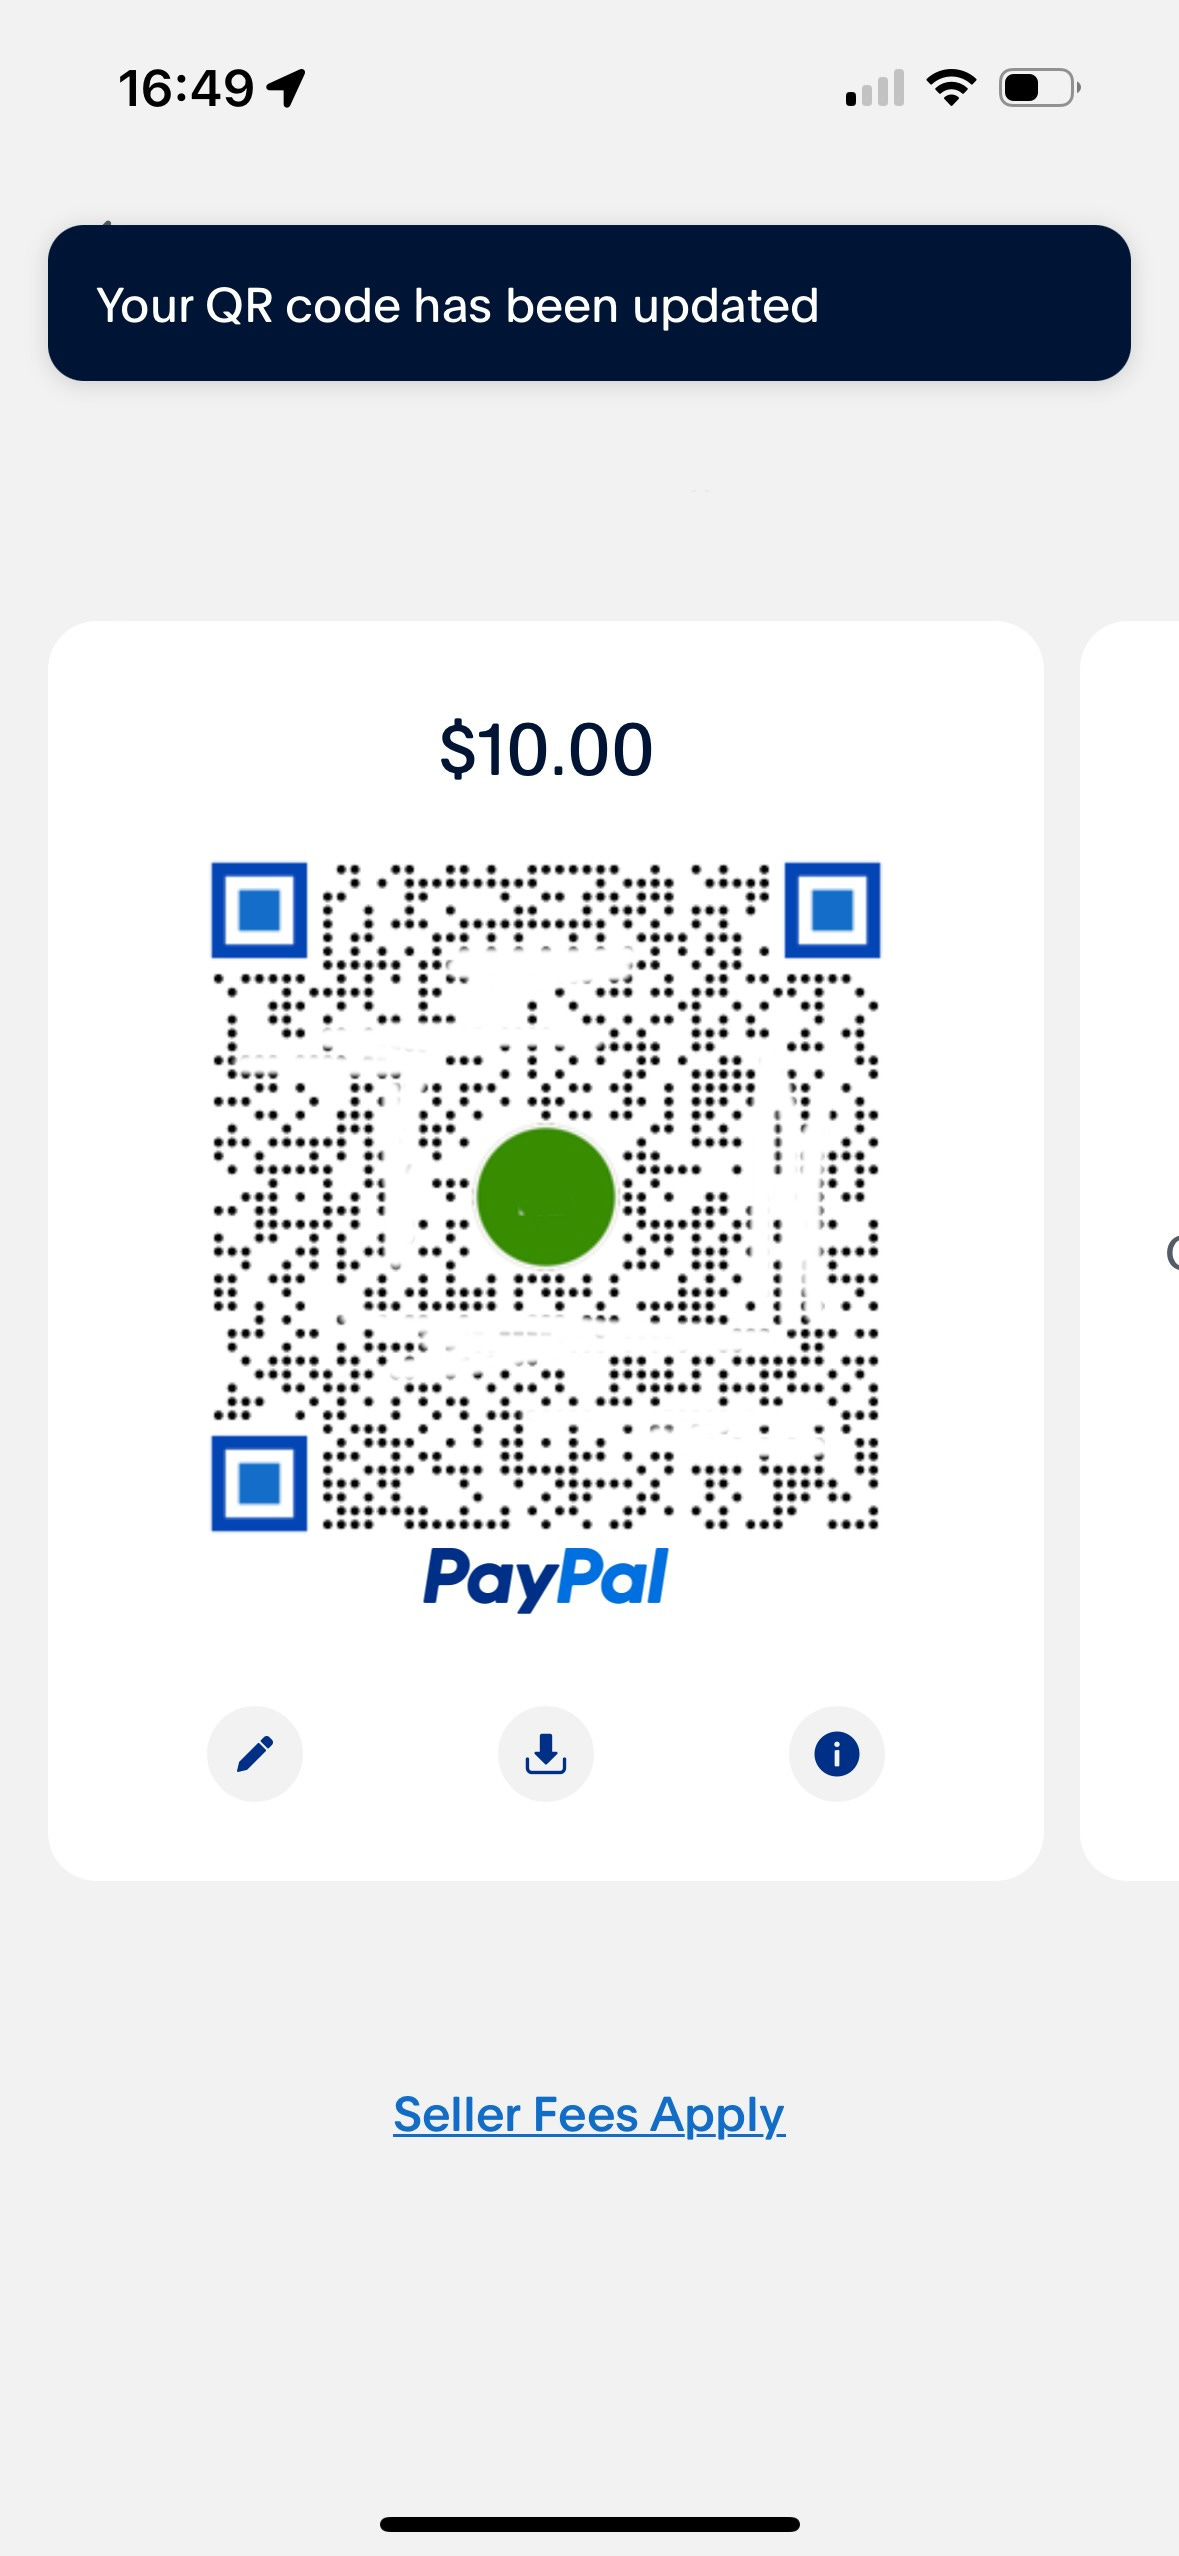
8. Your individualized QR code is ready
Click on option 2 (from step 5) and download your barcode to your phone.
It is stored with your photos. Send it from there to your computer and store it there.
You must repeat steps 5 to 8 for every individual amount you want to collect.
If you don’t insert an amount, the customer can insert any desired amount.
Proceed with step 16.
9. Download or open the PayPal App on your phone or tablet
Register a Paypal business account or log in to your account
Click on “Get Paid”.
10. Choose the way to get paid
Click on “Show QR code”.
11. Generate your Seller QR code
Click on “Get Started”.
12. QR code with options
Now, you see your seller code with your name at the top and your initials or your profile picture in the middle. At the bottom, you can choose from three options.
Insert amount/tip
Download code
Help
Click on option 1.
13. Specifying the payment amount
I recommend producing several barcodes for the payment amounts you need.
Click on “Add an amount”.
14. Produce the code with a fixed amount
Tick “Add an Amount” and insert the desired amount.
Click “Apply settings”.
15. Your individualized QR code is ready
Click on option 2 (from step 12) and download your barcode to your phone.
It is stored with your photos. Send it from there to your computer and store it there.
You must repeat steps 5 to 8 for every individual amount you want to collect.
If you don’t insert an amount, the customer can insert any desired amount.
16. Get your payment link
Scan your barcode with your photo app and copy the link to an email to yourself
17. Insert the link to your Substack on the page you need it
Open the menu “Button” in your Substack editor and click on “Custom”.
17. Generate the payment button for your Substack
In the first line, insert the text for your button; in the second line, insert the payment link you generated from your PayPal QR code.
18. Insert the QR code and text for getting support over your payment button; I have created a sample that you can adopt.
With this QR code, you can support SUBSTACK 101 KICKSTART via PayPal. Can you scan it? On smartphones, you can click the button below to open your PayPal App. Thank you!
That’s it!
You created your individualized PayPal payment for your Substack!
You are invited to use it to support SUBSTACK 101 KICKSTART!
You don’t use PayPal?
No problem. Here you can see the button we created in Monetization 2 for Stripe, and you are more than welcome to use it:
Do you enjoy SUBSTACK 101 KICKSTART?
Please consider upgrading to the paid subscription:
If you prefer to pay just for this content, that is fine. Here we go:
You don’t want to miss this? So join my amazing journey with you and your Substack by subscribing to SUBSTACK 101 KICKSTART. We’ll have fun, and I promise you for your Substack:
The best is yet to come!
Here, you can learn to do the same for Stripe:


