The fastest way to start monetizing outside the Substack subscription model is to build your own Stripe payment links.
Why?
If you have decided to offer paid subscriptions for your Substack, you must have signed up with Stripe and now own a Stripe account. Therefore, using this account for your monetizations, in addition to your subscription model, is easy.
First, let’s look at the prices we must pay for Stripe here on Substack and elsewhere. It sounds great — 2.9% of the transaction plus $0.30 in the US. Let’s do the math:
$1 payment: 2.9% → $0.03 + $0.30 → $0.33 → 33.0% fee
$2 payment: 2.9% → $0.06 + $0.30 → $0.36 → 18.0% fee
$3 payment: 2.9% → $0.09 + $0.30 → $0.39 → 13.0% fee
$4 payment: 2.9% → $0.12 + $0.30 → $0.42 → 10.5% fee
$5 payment: 2.9% → $0.15 + $0.30 → $0.45 → 9.0% fee
$10 payment: 2.9% → $0.29 + $0.30 → $0.59 → 5.9% fee
On top of this, you pay various surcharges: 1.5% for international cards, fraud prevention, and more charges. My experience with international charges is that you always end up above 5%, sometimes 6%. Plus 30 Cents. So for international charges - and that is much more than you believe — the math looks this way:
$1 payment: 5.5% → $0.06 + $0.30 → $0.36 → 36.0% fee
$2 payment: 5.5% → $0.11 + $0.30 → $0.41 → 21.0% fee
$3 payment: 5.5% → $0.16 + $0.30 → $0.46 → 15.3% fee
$4 payment: 5.5% → $0.22 + $0.30 → $0.52 → 13.0% fee
$5 payment: 5.5% → $0.28 + $0.30 → $0.58 → 11.9% fee
$10 payment: 5.5% → $0.55 + $0.30 → $0.85 → 8.5% fee
For international payments, small transactions always cause costs beyond 10%.
Is it advisable to pay such high fees?
I don’t recommend this in general for monetization, but occasionally, there are scenarios where it can make sense.
Some may even say I'm not concerned about the fees because they have higher price tags, which reduce the percentage of fees.
I recommend setting up some payment links because they can always be a good backup solution when other solutions fail, which we will cover in the next episodes.
Here we go:
1. Head to the settings area of your Stripe account
Clickunder “Products” on “Payments” and click on “Payment Links”:
2. Create a payment link
Click now on “Create payment link”.
3. Create a new product
Click on “Add new product”.
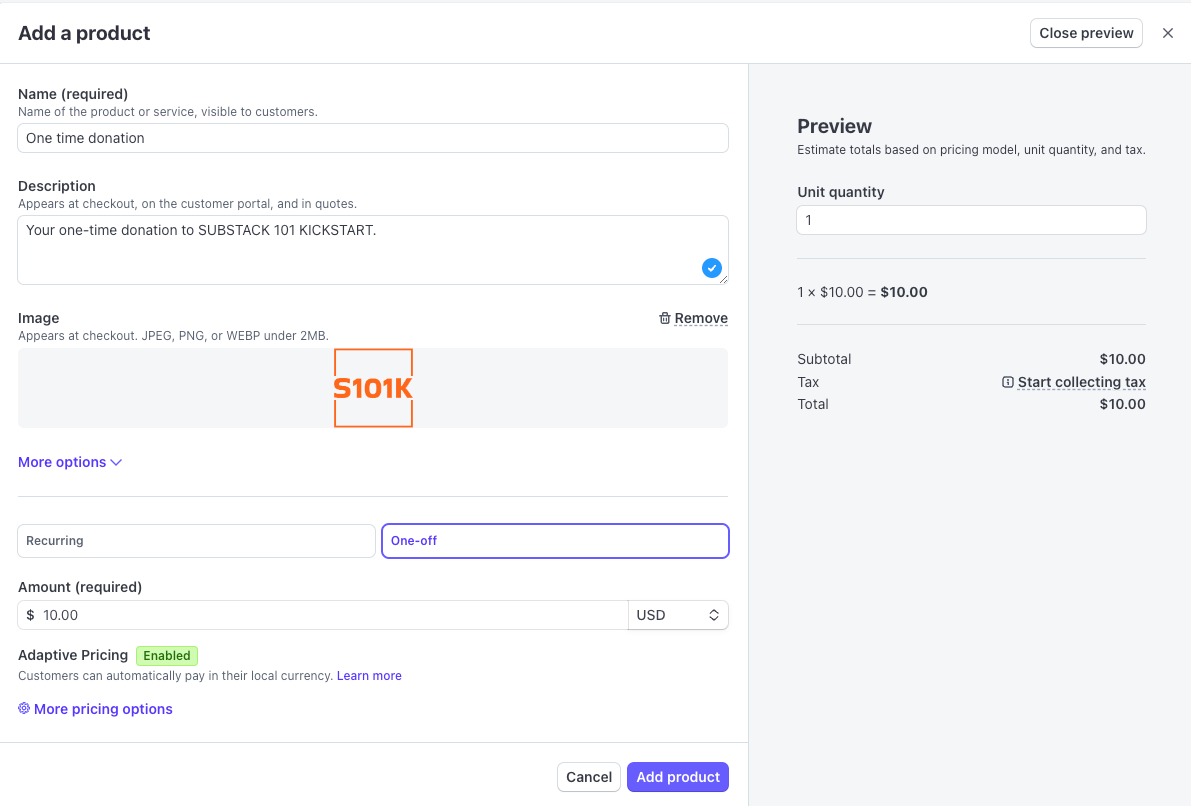
4. Add your product details
Add the name of your product
Add a description for your product (not mandatory, but highly recommended)
Add your logo (not mandatory, but highly recommended)
“More options” - not needed
Choose “Recurring or “One off”
Insert amount, choose currency
Enable or disable “Adaptive Pricing”
“More pricing options” not needed
Click on “Add product”
5. Review the payment page
You can generally leave it as Stripe does, but you can adjust the settings.
Click on “After payment” page.
6. Review the after-payment page
You can personalize your after-payment page with a personal message to your customer. There is no right or wrong; it is your personal note.
Click on “Create link”.
7. Copy your payment link
Click on the symbol beside the link and store the link with Ctrl V into a document.
8. Insert the link to your Substack on the page you need it
Open in your Substack editor the menu “Button” and click on “Custom”.
9. Generate the payment button for your Substack
In the first line, insert the text for your button, and in the second line, insert the payment link you have generated on Stripe.
That’s it!
You created your first individualized payment button for your Substack!
Here you can see the button we just created above, and you are more than welcome to use it:
Do you enjoy SUBSTACK 101 KICKSTART?
Please consider upgrading to the paid subscription:
If you prefer to pay just for this content, that is fine. Here we go:
You don’t want to miss this? So join my amazing journey with you and your Substack by subscribing to SUBSTACK 101 KICKSTART. We’ll have fun, and I promise you for your Substack:
The best is yet to come!
Here, you can learn why you should never use BuyMeACoffee:


