There are always things in life there is no alternative.
This is one of those.
What does this mean?
The default setting on Substack is that you use a subdomain of Substack, e.g., substackwriters.substack.com. In this example, substack.com is the domain, and substackwriters is the subdomain.
Or for SUBSTACK 101 KICKSTART, the Substack domain is s101k.substack.com.
If you have chosen cookingworld for your Substack name, your domain name is cookingworld.substack.com. So far, so easy. And yes, you can change your name for your subdomain, but that is not our subject here.
What does this setup mean for you?
Does Substack follow the WEF agenda?
I don’t know.
If you use Substack for your domain, as most writers do, you might end up owning nothing.
But you won’t be happy if you end there.
You can’t imagine this?
Substack owns your domain and every other subdomain used on Substack if it uses substack.com.
Period.
Is this smart?
Yes, for Substack.
But not for you.
If whoever, whichever, and whenever, decides to end the use of the domain you use now, you can end up canceled. You don’t exist anymore on the internet. You are gone. If you have, at this point, not secured your subscriber list and not secured your content, you will end up nowhere.
Nonetheless, even if you have secured it for a restart elsewhere, you will start for all search engines worldwide (DuckDuckGo, Swisscows, Startpage, and many more. I don’t mention here the internet criminals starting with G and B) from zero. All links will be gone, and all your history is worthless. And that is huge!
Will this happen?
I don’t know, but it is possible. Similar things have happened regularly in the short history of the internet, and that is why it is irresponsible not to be prepared for this scenario.
THEREFORE, YOU MUST HAVE YOUR OWN DOMAIN!
But:
There is good news!
It is easy to get it accomplished if you have some knowledge of the internet stuff.
It is also easy for all newbies to use the 27 steps of how-to outlined below.
Here we go:
1. Head to namecheap.com or your favorite domain reseller
Buy your favorite domain; this starts at around $10 per year. It would be nice if your domain name were related to your Substack title, but unnecessary. Avoid the use of brand names and protected IP. coketiger.com might not be the best idea if you want to avoid discussions with Atlanta. Every normal word or word combination might be good for you.
If you produce content that is critical of whatever, and the (local) government is not your best friend, I recommend choosing a domain reseller in a region/jurisdiction where you expect the least restrictions.
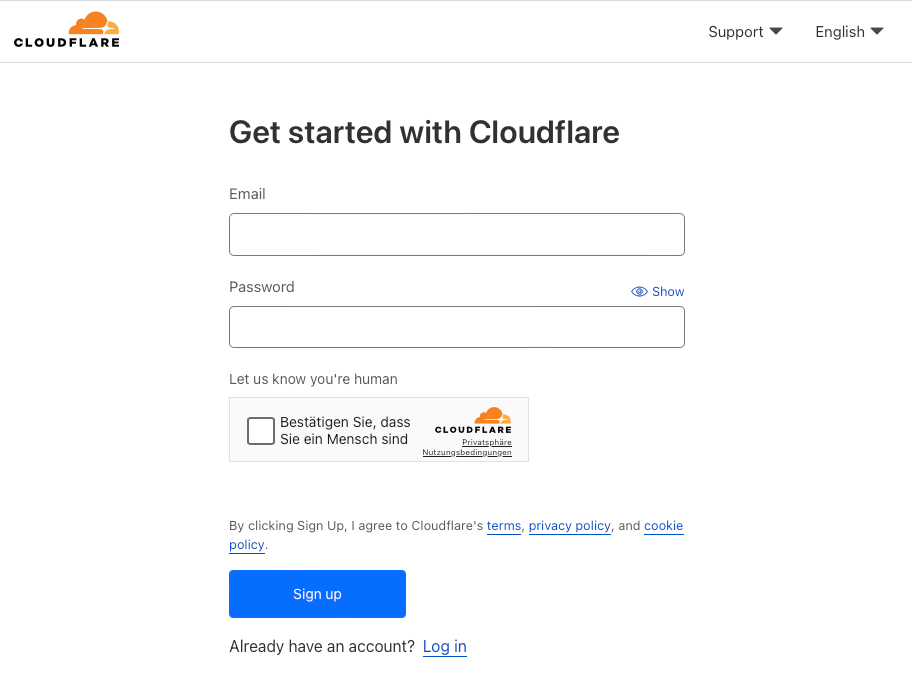
2. Head to cloudflare.com and open a free account
This is important for being flexible when your website goes offline for whatever reason in the future. It is not mandatory for your own domain, but I strongly recommend it. With Cloudflare, you can change your DNS entries within seconds from anywhere you have an internet connection.
This is not possible with the DNS systems of the many domain registrars. I also cannot explain here the use of all possible frontends of domain registrars. If you prefer to stick with whatever registrar's DNS system you can do, but I will not explain these systems to you.
3. After registering the account go to Home on Cloudflare
Click on “Add a site”.
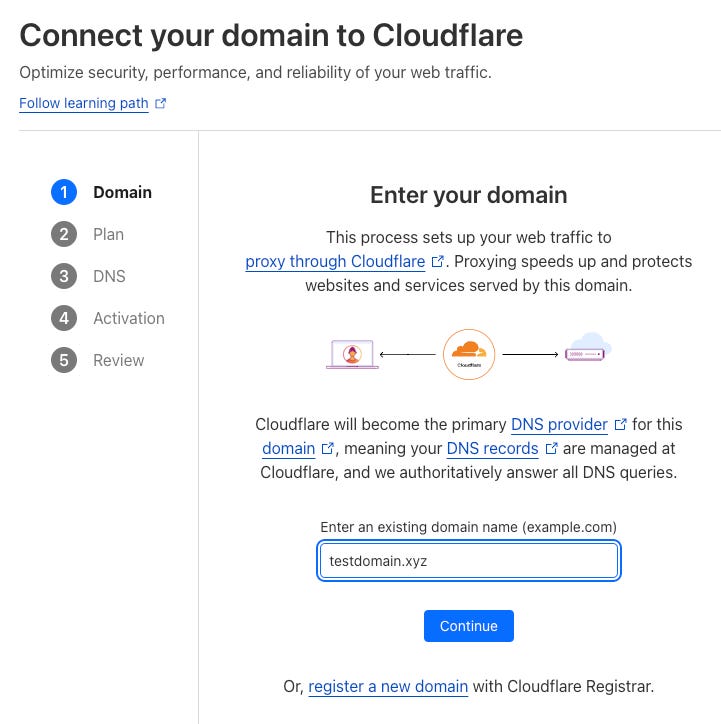
4. Insert your domain name on the next screen
Click on “Continue”.
5. Choose the Free plan
Click on “Confirm plan.”
6. Ignore the next window
Click on “Start quick scan”.
7. Ignore the next window
Click on “Continue”.
8. Now you can see for the first time your Cloudflare nameservers
Note your nameservers. In most cases, these are:
max-ns.cloudflare.com
olga-ns.cloudflare.com
Wait and head over to your domain registrar.
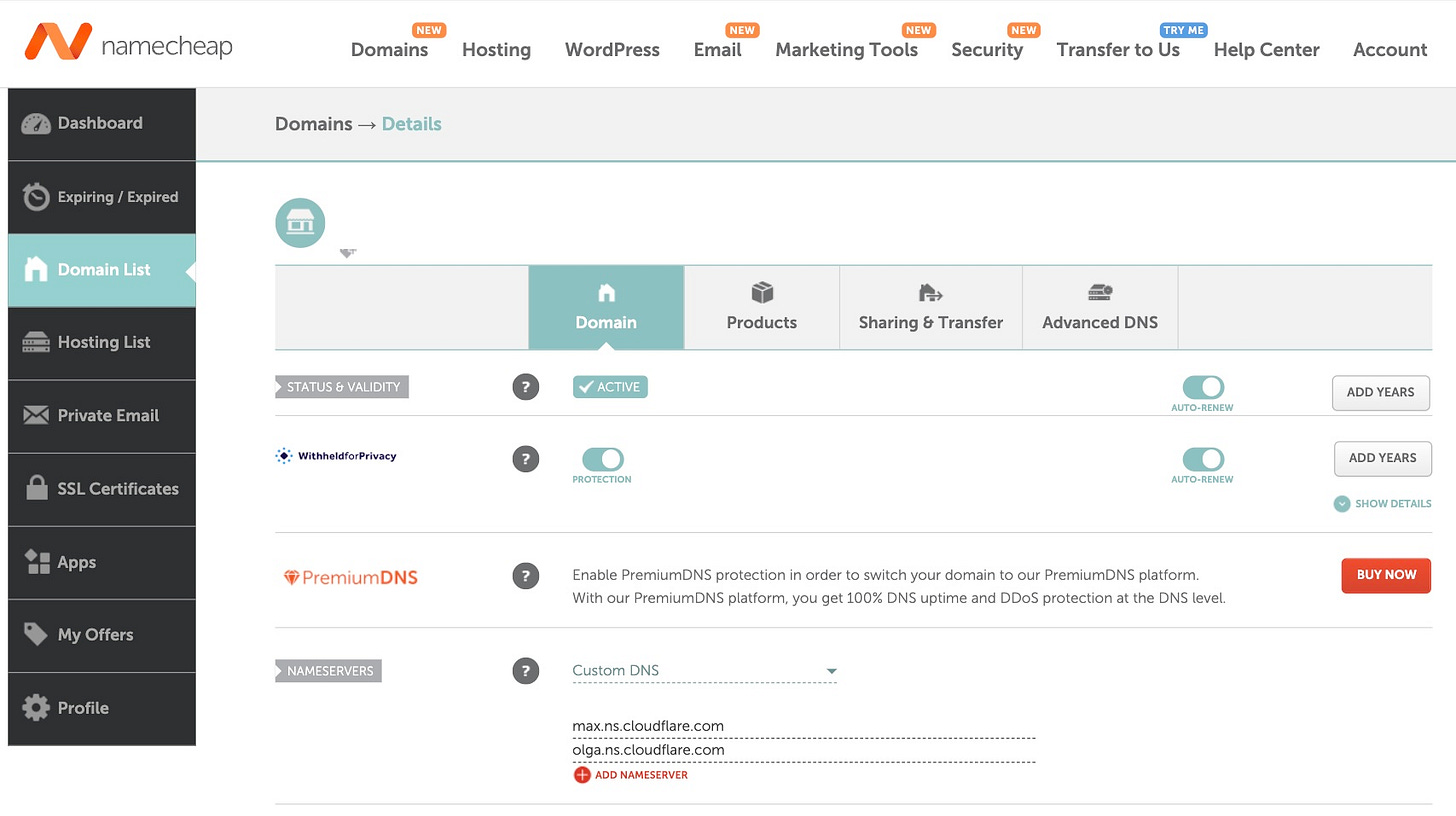
9. Login to your dashboard on namecheap.com or your chosen domain registrar
On namecheap.com, click “Domain List,” and you will see your just-bought domain.
Click on “Manage”.
10. Insert your nameservers
Under “nameservers,” choose “Custom DNS” and insert your nameservers from step 8. Save them.
10. Go back to Cloudflare, where you stopped with step 8
Click on “Continue” and you will see the screen “Review”.
Click now on “Continue to domain.xyz overview”.
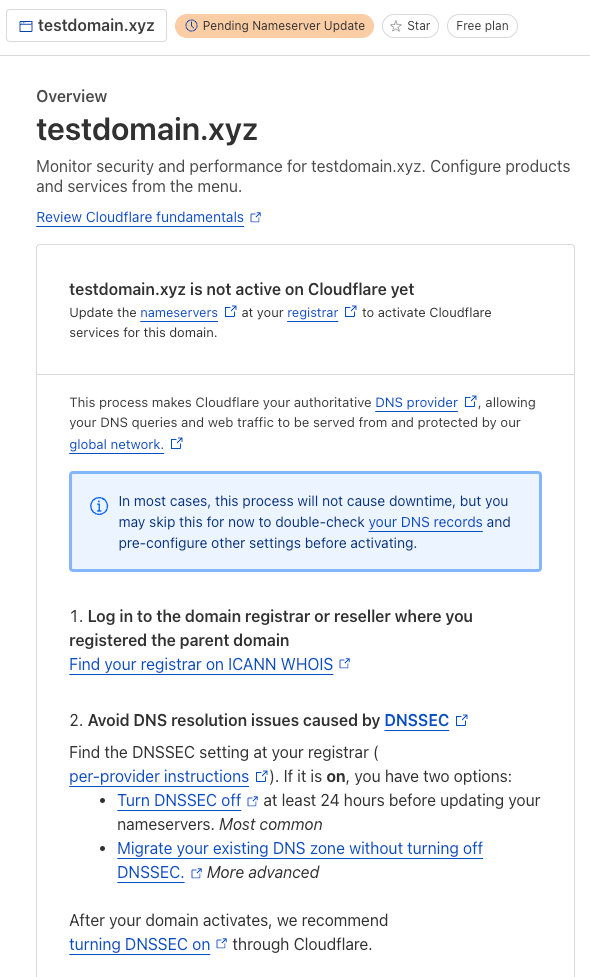
11. Now you see the Overview page for your new domain
12. Wait for the activation notification email from Cloudflare
This needs normally 60-120 minutes.
13A. Sign in to your Substack or
13B. If you are signed in
and you are not in the Admin console, click on Dashboard in the upper-right corner:
14. On your dashboard, click on “Settings”
15. On the left pane, click on “Domain”
16. In the section “Domain,” click on “Add custom domain”
17. Insert your payment data for the one-time fee of $50
Click “Unlock custom domain”.
18. Insert your domain name on the next screen
Note the CNAME entry, which you must enter on Cloudflare. It is always as shown in the screenshot.
Stop here and head over to Cloudflare.
19. Go to the DNS section of your dashboard at Cloudflare
Enter the record you noted on Substack (step 18).
IMPORTANT: Choose “DNS only”
Click “Save”.
You will see after saving this dashboard with the entry:
20. Go to Substack where you left in Step 18
Click on “Save and continue,” and you will see this screen:
21. You can now click “Check status,” and you will receive the information “Everything looks good; we need some hours.”
Your domain section has now changed on your dashboard; you can see there the status of your activation:
For SUBSTACK 101 KICKSTART I waited 100 minutes for the confirmation email:
22. CONGRATULATIONS!
You have freed yourself from the Substack DNS system and are now your own boss.
23. Send all traffic for your new domain to your Substack
This means not only the traffic for www.testdomain.xyz goes to your Substack but also all traffic for testdomain.xyz. I strongly recommend doing this.
Head back to the section “Domain” on your dashboard, and you will see a new button.
Click “Setup redirects”.
24. You see the window with the necessary DNS settings
Note the CNAME entry, which you must enter on Cloudflare. It is always as shown in the screenshot.
Stop here and head over to Cloudflare.
25. Go to the DNS section of your dashboard at Cloudflare
Enter the record you noted on Substack (step 24).
IMPORTANT: Choose “DNS only”
Click “Save”.
You will see after saving this dashboard with the entry:
26. Go to Substack where you left in Step 24
Click on “Setup root domain redirects”.
You see the status page, which you can also invoke from the domain section of your dashboard.
27. CONGRATULATIONS AGAIN, YOU ARE TOTALLY FREE NOW!
As soon as the nameservers and the Substack system have updated, your Substack will be reachable under your own domain, www.testdomain.xyz, and—if you followed my recommendation—also under testdomain.xyz.
From now on, YOU can independently decide where your valuable content is hosted, and nobody can shut you ever down.
That’s it!
Do you enjoy SUBSTACK 101 KICKSTART?
Please consider upgrading to the paid subscription:
If you prefer to pay just for this content, that is fine. Here we go:
You don’t want to miss this? So join my amazing journey with you and your Substack by subscribing to SUBSTACK 101 KICKSTART. We’ll have fun, and I promise you for your Substack:
The best is yet to come!


Share this post